iPhone XR Screen Replacement Guide: Most Easiet Way
iPhone XR Screen Replacement Guide: A Step-by-Step Tutorial
Most Easiet Way of iPhone XR Screen Replacement . In today’s fast-paced digital age, smartphones have become indispensable communication, work, and entertainment devices.
The iPhone XR is popular among these because of its smooth plan and noteworthy features. Accidents can happen; perhaps the most widely recognized issue iPhone clients face is a cracked or damaged screen.
Fortunately, you don’t have to race to the nearest repair shop and spend a fortune on fixing it. In this extensive guide, we’ll walk you through the most common way of replacing your iPhone XR screen, saving time and cash.
iPhone XR Screen Replacement Guide Presentation
Accidents are an unfortunate part of life, and if you’re an iPhone XR proprietor, you could have encountered the heart-sinking second when your telephone’s screen shatters. Notwithstanding, repairing it doesn’t have to be a daunting task. You can replace your iPhone XR screen at home with suitable devices, a steady hand, and patience.
Devices and Materials You’ll Need
Before you start, gather the accompanying devices and materials:
- A replacement iPhone XR screen
- A small Phillips screwdriver
- A pentalobe screwdriver
- A plastic spudger instrument
- Tweezers
- A plastic separator instrument
- Adhesive strips or twofold-sided tape
- A heat weapon or hair dryer
- A clean, sufficiently bright workspace
Safety Precautions
Safety ought to be your primary concern. Guarantee that your iPhone is controlled, and detach any charging cables before starting the repair. Additionally, wear safety glasses to safeguard your eyes from any glass shards.
Step 1: Power Off Your iPhone XR
Press and hold the power button until the “slide to drive off” slider appears on the screen. Swipe it to switch off your iPhone XR.
Step 2: Eliminate the Screws
Utilizing the pentalobe screwdriver, carefully eliminate the screws around the frame of your iPhone XR.
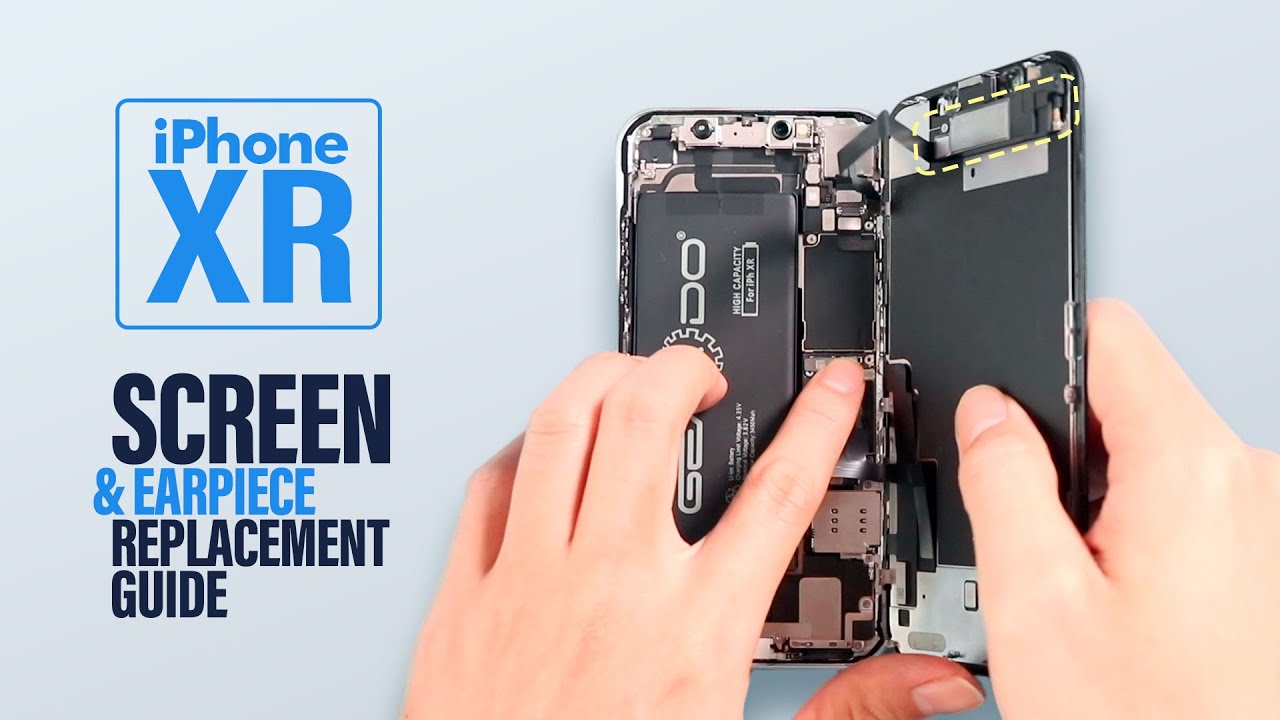
Step 3: Opening the iPhone XR
Embed the plastic separator instrument between the screen and the frame and delicately get into the gadget. Be patient and cautious during this step to avoid damaging any parts.
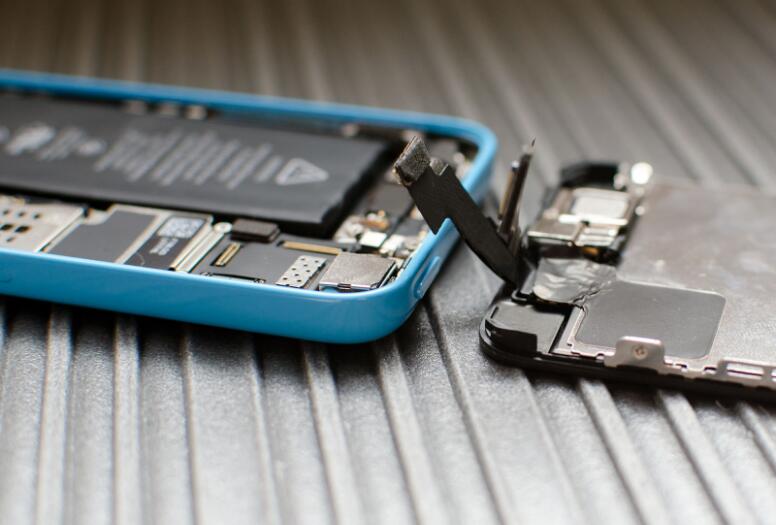
Step 4: Disengage the Battery
Inside your iPhone XR, you’ll track down the battery. Utilize the plastic spudger device to disengage it to forestall any electrical mishaps carefully.
Step 5: Eliminating the Damaged Screen
Carefully eliminate the damaged screen with the battery separated by delicately lifting it away from the gadget.
Step 6: Install the New Screen
Place the new screen ready and guarantee it’s appropriately aligned. Carefully press it into place.
Step 7: Reconnect the Battery
Reconnect the battery utilizing the plastic spudger device.
Step 8: Close the iPhone XR
Carefully close the iPhone by delicately squeezing the frame back together. Make sure it’s safe.
Step 9: Replace the Screws
Utilize the pentalobe screwdriver to replace the screws around the frame.
Step 10: Power On and Test
Power on your iPhone XR and test the new screen to guarantee it works appropriately. If everything looks great, you’ve effectively replaced your screen.

Investigating Tips of iPhone XR Screen Replacement
If you experience any issues during the replacement interaction, counsel investigating guides or seek professional assistance. Force no parts, as this can cause further damage.
Congratulations! You’ve effectively replaced your iPhone XR screen, saving time and cash. With suitable instruments and patience, Do-It-Yourself repairs can be a savvy answer for everyday smartphone issues.
Advanced Tips for a Seamless iPhone XR Screen Replacement
Now that you’ve effectively replaced your iPhone XR screen, you should investigate a few advanced tips to guarantee that your gadget looks and works flawlessly. These tips will assist you with going past the basics and achieving professional-level outcomes.
1. Utilize Great Replacement Parts
While purchasing a replacement screen, settle on excellent parts from reputable providers. Quality matters, as subpar parts can affect display clarity and touchscreen responsiveness. Putting resources into a decent-quality replacement screen guarantees a life span and a near-original encounter.
2. Appropriately Align the Replacement Screen
Guarantee that the replacement screen is unequivocally aligned before getting it. Misalignment can bring about issues like touch responsiveness issues or crooked edges. Take your time during this step to guarantee a seamless fit.
3. Apply Adequate Adhesive
Utilize the given adhesive strips or twofold-sided tape liberally while getting the replacement screen. Adequate adhesive guarantees severe strength areas and keeps residue or garbage from entering the gadget. This added security will help your iPhone XR’s screen stay in place over the long haul.
4. Calibrate the Touchscreen
After installing the new screen, it’s brilliant to calibrate the touchscreen. This can be finished in the gadget’s settings under “Accessibility.” Calibrating the touchscreen guarantees accurate touch reactions and limits any issues with contact accuracy.
5. Safeguard Your New Screen
Consider utilizing a screen defender and a strong telephone case to forestall future damage. A screen defender adds an extra layer of insurance against scratches and minor impacts. At the same time, a case helps safeguard your gadget from accidental drops.
6. Regularly Clean Your Screen
Maintaining a clean screen keeps your iPhone XR looking sharp and assists with touchscreen responsiveness. Utilize a microfiber fabric to wipe away fingerprints and smirch regularly and delicately.
7. Backup Your Data
Before starting the screen replacement, backing up your data to iCloud or your computer is advisable. This guarantees that your vital information is safe during the repair if anything turns out badly.
8. Stay Informed
Stay updated with the latest information about your iPhone XR, including software updates and investigating guides. This information can be invaluable if you experience any issues with your gadget.
9. Look for Professional Assistance if necessary
Get professional assistance if you experience any hardships or uncertainties during the screen replacement process. A few tasks, for example, reconnecting intricate cables or dealing with stowed-away issues, may require the mastery of a talented technician.
By following these advanced tips, you can take your iPhone XR screen replacement abilities to a higher level and guarantee that your gadget keeps giving an exceptional client experience.
All in all, replacing the screen of your iPhone XR is a feasible Do-It-Yourself project with suitable devices and information. It can save you cash and engage you to take control of your gadget’s maintenance.
In any case, always practice caution, focus on safety, and be prepared to seek professional assistance if necessary. With these steps and advanced tips, you can use a completely functional iPhone XR with an unblemished screen.
Related Posts